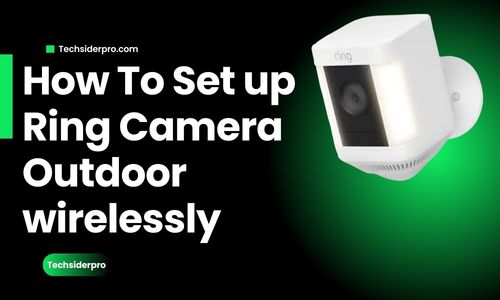
Quick Answer: Setting up your Ring camera wirelessly outdoors is a straightforward process that involves finding an optimal location, securing a strong Wi-Fi connection, mounting the camera, and configuring settings through the Ring app. With these steps, you’ll have an efficient outdoor monitoring system without needing to run any wires.
Introduction
At TechSiderPro, we know that wireless setups are convenient and can save you the hassle of managing cables, especially for outdoor spaces. In this guide, we’ll walk you through everything you need to set up your Ring camera wirelessly outdoors, covering everything from choosing the right location to optimizing Wi-Fi and configuring settings.
Step 1: Select the Best Location
Finding the right location is essential for a clear view and reliable performance from your wireless Ring camera. Place the camera in areas with a high vantage point for the best coverage and minimal obstructions.
Tips for Choosing the Best Spot
- Height and Angle: Mount the camera 8-10 feet above the ground and adjust the angle to cover the most critical areas.
- Proximity to Wi-Fi Router: Since it’s wireless, a strong Wi-Fi signal is crucial. Avoid areas with potential interference, like thick walls.
- Weather Protection: Place the camera under eaves or a shaded spot to protect it from rain and direct sunlight.
Related: Where to Put Your Ring Security Cameras
Step 2: Ensure Reliable Wi-Fi Coverage
A stable Wi-Fi connection is vital for wireless cameras, as it allows for smooth video streaming and real-time notifications. Conduct a Wi-Fi strength test at your chosen location before mounting the camera.
How to Check Wi-Fi Signal Strength
- Open the Ring app and navigate to “Device Health” for your camera.
- View the signal strength to ensure it’s strong enough for uninterrupted service.
- Consider adding a Wi-Fi extender to strengthen the signal if needed.
For properties with expansive coverage needs, a mesh Wi-Fi system can help maintain consistent connectivity.
Step 3: Mount Your Ring Camera
Once you’ve determined the ideal spot and confirmed Wi-Fi strength, it’s time to mount your camera. Wireless Ring cameras are typically battery-powered, making them easier to install without complicated wiring.
How to Mount Your Wireless Camera
- Attach the Mounting Bracket: Mark the mounting points and drill holes as needed.
- Secure the Camera: Attach the camera to the bracket, then adjust it to the optimal angle.
- Test for Coverage: After mounting, check the live feed to make sure it captures the desired view.
Related: Step-by-Step Guide to Installing Ring Cameras
Step 4: Power Up and Connect Your Camera Wirelessly
If your Ring camera uses a rechargeable battery, make sure it’s fully charged before installation. Once powered up, you can connect the camera to your Ring app.
Connecting the Camera to Wi-Fi
- Open the Ring app and choose “Set Up a Device.”
- Scan the QR code on your camera to initiate the setup.
- Follow the prompts to connect your camera to Wi-Fi and name the device.
Tip: Use a strong password for your Wi-Fi to prevent unauthorized access to your network.
Step 5: Customize Your Camera’s Settings
With the camera mounted and connected, it’s time to configure settings to get the most out of your device. The Ring app offers several customization options, allowing you to tailor alerts and motion sensitivity to your needs.
Recommended Settings for Outdoors
- Motion Zones: Define zones to reduce false alerts from nearby roads or sidewalks.
- People Only Mode: Use this mode if you want the camera to focus on detecting people.
- Recording Quality: Adjust recording quality depending on your internet speed and storage needs.
Pro Tip: Higher-quality video consumes more data, so ensure your Wi-Fi plan can support it.
Step 6: Test and Monitor Your Camera
Once everything is set up, conduct a few tests to ensure everything is working correctly. Walk through the detection zones, adjust the angle if needed, and test the two-way audio feature for clarity.
Testing Tips
- Live View: Open the Ring app to view the live feed and check if the camera covers all desired areas.
- Motion Alerts: Trigger motion by moving within the detection zones, and ensure you receive notifications.
- Audio Check: Test the two-way audio feature to confirm sound clarity and speaker volume.
Maintaining Your Wireless Ring Camera
Routine maintenance will help keep your camera operating at its best, especially for outdoor setups exposed to the elements.
Key Maintenance Tips
- Battery Check: For battery-powered cameras, recharge every few months or consider adding a solar panel for consistent power.
- Keep the Lens Clean: Regularly wipe the camera lens to prevent dust buildup.
- Firmware Updates: Enable automatic updates in the Ring app to stay up-to-date with the latest features and security patches.
Frequently Asked Questions
Q1: How Long Does the Battery Last on a Wireless Ring Camera?
The battery life of a wireless Ring camera typically lasts between 6-12 months, depending on usage. Heavy recording and frequent live views may drain the battery faster. Consider using a Ring Solar Panel for longer battery life.
Q2: Can a Ring Camera Be Installed Without Wi-Fi?
Ring cameras require Wi-Fi for full functionality, including live viewing and motion alerts. However, if you don’t have Wi-Fi, explore our guide on Can Ring Camera Connect to a Hotspot? (Internal Link) for alternatives.
Q3: Is the Wireless Ring Camera Weatherproof?
Yes, Ring’s wireless cameras are built to withstand various weather conditions. For more details on weather resistance, check out our article on Protecting Your Outdoor Ring Camera.
Conclusion
Setting up a Ring camera wirelessly outdoors is a convenient way to enhance home security without the hassle of running wires. With the right preparation and following these steps, you’ll have a reliable outdoor security system in place. For more guides on Ring devices and troubleshooting tips, explore our related resources on TechSiderPro.

