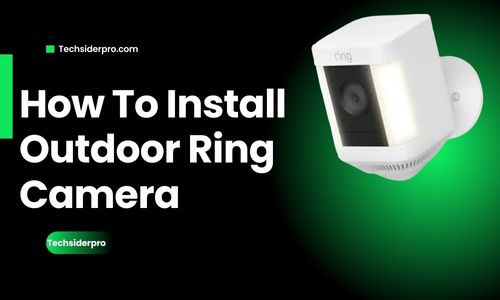
Quick Answer: Installing an outdoor Ring camera involves choosing the right location, securing the camera to the wall or ceiling, connecting it to Wi-Fi, and adjusting the camera settings for optimal performance. For a successful installation, follow each step carefully and use the tools provided with the Ring camera kit.
Why Trust TechSiderPro?
At TechSiderPro, we provide readers with trusted guidance for setting up and troubleshooting smart home devices. Our expertise in Ring and other smart camera systems ensures you’ll have a seamless experience in installing and using your Ring camera outdoors.
Step 1: Choose the Right Location
Selecting the right spot for your outdoor Ring camera is essential for optimal coverage. Here are a few tips:
- Cover Key Areas: Place your camera at entry points like doors, garages, or gates.
- Install at the Right Height: About 8-10 feet high is ideal for capturing clear footage while keeping the camera out of reach.
- Avoid Direct Sunlight: Place your camera in shaded areas to avoid lens flare and overheating.
💡 Pro Tip: Check the Field of View of your camera to ensure it covers critical areas. If you’re unsure, you can adjust it after setup.
Step 2: Gather Tools and Materials
Your Ring camera kit should include mounting hardware, screws, and a drill bit. Here’s what else you’ll need:
- Drill for creating holes in the wall.
- Screwdriver for tightening screws.
- Ladder if installing the camera at a height.
For models requiring electrical wiring, ensure you have a voltage tester and wire connectors.
Step 3: Mount the Camera
- Mark the Spot: Use the mounting bracket as a guide and mark where the screws will go.
- Drill Holes: If you’re mounting on brick, concrete, or stucco, use the provided drill bit. For wood or siding, standard screws should work.
- Attach the Bracket: Secure the mounting bracket to the wall with the provided screws.
- Place the Camera: Attach the camera to the bracket, adjusting the angle as needed.
🔗 Related Guide: For specific tips on mounting, check out out “Where to Put Your Ring Security Cameras“
Step 4: Connect the Camera to Power
Depending on your Ring camera model, you may need to:
- Plug it into a Power Outlet: Some models come with a power adapter that requires an outdoor-rated outlet.
- Use a Solar Panel: Certain Ring cameras are compatible with solar panels, offering a hassle-free power solution. Check out our guide on Adding a Solar Panel to Your Ring Camera for step-by-step instructions.
- Wire it to Your Home: If your model supports hardwiring, follow the user manual closely.
💡 Safety Tip: Turn off the main power if you’re hardwiring the camera to avoid electrical hazards.
Step 5: Connect the Camera to Wi-Fi
To connect your camera:
- Open the Ring App: Download it if you haven’t already.
- Choose “Set Up a Device” in the Ring app and follow the on-screen instructions to add your camera.
- Scan the QR Code: The code is typically located on the device or in the packaging.
- Connect to Wi-Fi: Choose your home network, enter the password, and let the camera sync.
🔗 Quick Link: For help with Wi-Fi connectivity, see out :Ring Camera Wi-Fi Troubleshooting Guide.
Step 6: Adjust Settings for Best Performance
Once the camera is online, adjust these settings in the Ring app:
- Motion Detection: Set up custom zones to focus on critical areas.
- Motion Sensitivity: Adjust sensitivity to reduce false alarms.
- Live View: Enable live view for instant access to your camera’s feed anytime.
For additional tips, visit our offilial post on Adjusting Ring motiion warnings for enhanced security.
Step 7: Test and Finalize the Installation
After setup, ensure everything is functioning correctly by:
- Testing Motion Detection: Walk in front of the camera to see if it detects movement.
- Checking Video Quality: Review the camera’s live feed for clear video quality.
- Adjusting the Angle: Fine-tune the camera’s positioning if needed.
Benefits of Installing a Ring Camera Outdoors
Investing in a Ring camera enhances your home’s security and adds valuable peace of mind. Benefits include:
- Real-Time Alerts: Get notified instantly of any activity.
- Enhanced Security: Deters potential intruders with motion-activated lights and audio.
- Two-Way Communication: Engage with guests or discourage intruders from a distance.
Common Issues and How to Troubleshoot
Even with a smooth setup, you might encounter common issues like Wi-Fi drops or low video quality. Here’s a quick troubleshooting guide:
- Wi-Fi Connectivity Issues: Place your router closer to the camera or use a Wi-Fi extender for better signal strength.
- Poor Video Quality: Check the internet speed and adjust the camera settings to enhance clarity.
- False Alarms: Adjust motion detection zones and sensitivity to reduce unwanted alerts.
FAQs
Q: Can I install my Ring camera on brick or concrete?
A: Yes, use the masonry drill bit provided and the appropriate anchors to secure it firmly.
Q: Is a subscription necessary to use all features?
A: While basic features work without a subscription, Ring Protect plans unlock additional benefits like video history and sharing options. Check our guide on Ring Protect plans for more information.
Q: Can I install the camera without an electrician?
A: Yes, if it’s a battery or plug-in model. For wired models, professional installation is recommended if you’re unfamiliar with electrical work.
Conclusion
Installing an outdoor Ring camera can greatly improve your home’s security and give you peace of mind. By following these steps, you can ensure your camera is set up correctly, providing reliable coverage of key areas around your home. Remember, keeping your Ring app up-to-date and exploring Ring’s settings will help you maximize your camera’s effectiveness.
By ensuring a safe and secure installation, your Ring camera will be a powerful tool for monitoring and protecting your property. For further assistance, feel free to comment us!

